Blush Placement Guide for Every Face Shape
The short answer
Place blush on the cheekbones — not the apples.
Why Placement Matters More Than Color
Blush is the most expressive tool in a makeup kit for adding life and dimension to the face. A perfect color choice can be completely undermined by poor placement — and the right placement can make an average shade look stunning. The position, angle, and weight of blush on the face changes the apparent shape of the cheekbones, the length of the face, and the perceived age of the wearer.
The common advice "smile and apply blush to the apples of your cheeks" works for a natural, youthful look on certain face shapes, but it is not universally flattering. On a round face it widens; on a long face it can shorten in the wrong direction; on a square face it can emphasize angularity. Tailoring placement to your face shape gets better results across all skin tones, blush formulas, and looks.
How to Identify Your Face Shape
Before choosing a placement, establish your face shape. The simplest method:
- Pull hair fully back and stand before a mirror.
- Trace your face outline on the mirror with a lip liner or dry-erase marker.
- Step back and assess the traced shape against the five key measurements: forehead width, cheekbone width, jawline width, and face length.
| Shape | Key Proportions |
|---|---|
| Oval | Face length roughly 1.5× the width; forehead slightly wider than jaw; gentle curve from cheekbones |
| Round | Face length and width are approximately equal; full cheeks; soft, curved jawline |
| Square | Forehead, cheekbones, and jaw roughly equal width; strong, angular jawline |
| Heart | Wide forehead, prominent cheekbones, narrow or pointed chin |
| Diamond | Narrow forehead and jaw; cheekbones are the widest point |
| Oblong / Long | Face length substantially greater than width; forehead, cheekbones, and jaw similar width |
The Foundation Rules (All Face Shapes)
Before the shape-specific adjustments, these universal principles apply:
1. Start at the cheekbone, not the nose. Place your brush at the outermost part of the cheekbone (roughly in line with the outer edge of the iris) and sweep outward and upward. Starting at the nose and sweeping inward concentrates pigment near the center of the face and can make the nose appear wider.
2. Blend upward toward the temple, not straight across. A diagonal upward angle lifts the face. A straight horizontal line can read as a slash.
3. Less product than you think. Blush catches light on the most prominent, forward-facing cheek surface. A small amount appears vivid; build gradually.
4. The "three-finger rule" for avoiding the no-blush zone. Place three fingers flat against the side of your nose. Everything medial to your pinky finger (toward the nose) should have no blush. This keeps color away from the center of the face.
Blush Placement by Face Shape
Oval Face
Goal: Enhance natural symmetry; maintain balanced proportions.
Oval is the reference shape because it has naturally balanced proportions. Almost any blush placement works, making oval the best shape to experiment from. The standard technique:
- Sweep blush from the top of the cheekbone (outer iris line) diagonally upward toward the temple.
- Build color at the cheekbone peak and fade toward the hairline.
- Can also carry a gentle wash across the nose bridge for a sun-kissed effect.
Avoid: Applying blush so low that it pulls the eye downward and makes the face look longer than it is.
Round Face
Goal: Create the illusion of length and structure; visually define the cheekbones.
Round faces have approximately equal width and length with full cheeks and soft features. Blush placement here is about creating vertical lift and cheekbone definition.
- Apply blush higher on the cheekbone than you would for other shapes — closer to the outer corner of the eye rather than in the apple.
- Sweep steeply upward toward the temple, almost at a 45-degree angle. This diagonal line draws the eye up and makes the face appear longer and more oval.
- Avoid the apple entirely — color on the soft front of the cheeks reinforces roundness rather than counteracting it.
- Keep the innermost edge of the blush above the level of the nose tip.
A helpful visual: imagine placing blush in a backward 'C' starting at the top of the cheekbone and curving up to the temple.
Square Face
Goal: Soften angular features; add curve and warmth to a structured silhouette.
Square faces have strong, defined angles at the jaw and brow. Blush can soften this by introducing rounded, circular shapes.
- Apply blush on and slightly below the cheekbone, including a light touch on the apple of the cheek in a circular, rounded motion.
- Sweep outward and slightly upward toward the ears — not steeply upward (which can over-emphasize the square width) but in a gentle diagonal.
- The circular motion at the apple creates softness that counters the angularity of the jaw and temples.
- A softer, more diffused application (versus a sharp diagonal line) serves this face shape better.
Avoid: A purely horizontal placement that amplifies width; very high, diagonal placement that creates a second set of strong diagonal lines.
Heart Face
Goal: Balance a wider upper face against a narrower chin; draw attention downward slightly.
Heart faces are widest at the forehead and cheekbones, narrowing to a pointed or narrow chin. Blush balances the proportions by adding color lower and drawing attention away from the forehead.
- Place blush starting slightly lower on the cheek — below the standard cheekbone level, on the apple and just above it.
- Sweep in a gentle C-shaped curve upward and outward toward the ear (not steeply upward toward the temple, which would widen an already wide upper face).
- Keep the application soft and not too far toward the temples — this avoids adding apparent width to the already wider upper face.
- A light, romantic, rounded application suits this face shape better than a structured angular sweep.
Avoid: Very high or very angular placement toward the temples, which amplifies the width contrast between forehead and chin.
Diamond Face
Goal: Soften the prominence of wide cheekbones; add visual width to the forehead and jaw.
Diamond faces are defined by very prominent cheekbones that are the widest point of the face, with a narrow forehead and jawline. Blush placement should complement rather than exaggerate the cheekbones.
- Sweep blush outward along the top of the cheekbone toward the ear.
- Keep the placement slightly lower on the cheekbone than for round or oval — avoid placing heavy pigment at the apex of the cheekbone where it is already prominent.
- A soft diffused horizontal-to-slightly-diagonal sweep works well.
- Can add a light touch of blush to the temples to add apparent width to the narrow upper face.
Avoid: Heavy concentration at the highest cheekbone point, which further emphasizes width; very diagonal upward sweeps that make the narrow forehead look smaller by contrast.
Oblong / Long Face
Goal: Visually shorten and add width; avoid placement that elongates further.
Long faces have a face length substantially greater than the width, often with a high forehead or long chin.
- Apply blush on the apples of the cheeks and sweep horizontally outward toward the ears — a more horizontal angle than most other shapes.
- This placement adds visual width across the middle of the face, breaking up the vertical length.
- A rounder, fuller application rather than a steep diagonal gives the face a more oval appearance.
- Keep color away from the temples to avoid adding apparent length to the top of the face.
Avoid: Steep diagonal placement upward toward the temples — this elongates an already long face further.
Blush by Formula and Finish
The placement technique adapts slightly based on the blush formula:
Powder Blush
The most forgiving formula for placement. Use a fluffy tapered brush for precise placement and a rounded fluffier brush for diffused, natural blending. Build gradually — it's much easier to add than to remove.
Application order in a full routine: powder blush goes after foundation and bronzer, before highlighter.
Cream Blush
Blends into the skin for a skin-fused, natural finish. Apply with fingertips (warm the product; blend quickly), a flat-top brush, or a damp beauty sponge using a tapping/stippling motion. Cream blush should be applied directly to skin or over a light foundation base — heavy powder beneath prevents seamless blending.
Liquid Blush
The most pigmented formula — a little goes a very long way. Dot one to two drops directly on the cheek in the correct placement zone, then blend immediately with fingertips or a sponge using a tapping and diffusing motion. Work fast — liquid blush begins setting within seconds on warm skin.
Blush Color by Skin Tone
While any skin tone can wear any blush color, some combinations are more intuitive starting points:
| Skin Tone | Flattering Blush Families |
|---|---|
| Fair / Porcelain | Soft pinks, peaches, light corals, baby mauves |
| Light / Medium | Warm peach-corals, rose-pinks, dusty roses |
| Medium / Tan | Warm terracotta, deep coral, peachy-brown, berry |
| Deep / Rich | Vivid berry, deep plum, brick, warm brown-rose |
The finish matters too: matte and satin finishes tend to be universally flattering; intense shimmer blush can emphasize texture on mature or textured skin.
Common Blush Mistakes
Applying too low: Color below the cheekbone rides on the soft, round tissue of the lower cheek and can drag features downward, making the face look older or heavier.
Applying too close to the nose: This narrows the center of the face and can make the nose appear larger. Respect the three-finger exclusion zone.
Forgetting to blend the edges: A visible boundary between blush and bare skin is the most obvious sign of improperly applied blush. A clean fluffy brush swept over the edges after application softens any hard lines.
Using too much product: Blush is vivid in the pan but builds quickly on skin. Start with a lightly loaded brush and build. With cream and liquid formulas, start with half the amount you think you need.
Related reading: How to Apply Bronzer · How to Highlight · Blush Types Comparison · Contouring by Face Shape · Contouring Guide for Beginners
Products that fit this guide
Picked by code from each product's full ingredient list.
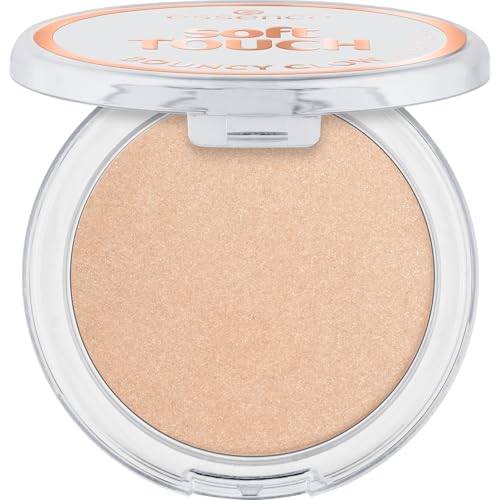
Essence
Soft Touch Bouncy Glow
bronzer · 4 g · 17 ingredients
- Fragrance-free
- No essential oils
- With titanium dioxide
Catrice
Melted Sun Liquid Bronzer
bronzer · 10 ml · 19 ingredients
- Fragrance-free
- No essential oils
- With hyaluronic acid
- With glycerin
- With titanium dioxide

W7
Golden Glow Bronzing Drops
bronzer · 35 ingredients
- Fragrance-free
- No essential oils
- With hyaluronic acid
- With glycerin
- With peptides

Catrice
Aura Glam Bouncy Highlighter
bronzer · 6.4 g · 20 ingredients
- Fragrance-free
- No essential oils
- With titanium dioxide
- With dimethicone
- With vitamin e
Frequently asked questions
Is the 'smile and apply to the apples' blush rule still valid in 2026?
The apple technique is not wrong, but it is limited. It works well for round, youthful, or romantic looks — and it is genuinely flattering on oval and heart face shapes. However, it places color low on the face, which can drag features downward on some shapes (particularly oblong or round faces). The swept cheekbone-to-temple placement is more versatile and more commonly used by professional makeup artists for its lifting and defining effect. For everyday warmth, the apples are fine; for the most flattering structural result, follow the placement guide by face shape.
How do I find my face shape quickly?
Pull your hair back and trace your face outline on a mirror with a lip liner, then step back and compare the shape to the six categories: oval (longer than wide with a gentle taper), round (roughly as wide as long with soft curves), square (defined angular jaw matching forehead width), heart (wide forehead, narrow chin), diamond (narrow forehead and jaw, wide cheekbones), or oblong (clearly longer than wide with similar widths throughout). Most people are a blend of two adjacent shapes — the dominant one guides placement.
Should blush go before or after setting powder?
Powder blush can be applied before or after loose setting powder — though applying over a light set of foundation generally gives a more natural, diffused result. Cream and liquid blush should go directly on the skin or over a thin layer of foundation, before any powder products. If you powder over cream blush, the powder can disturb or lighten the cream color if it has not fully set.
Can I wear blush without foundation?
Absolutely — and many people find blush looks more natural directly on bare skin or over a tinted moisturizer than over a full foundation. Cream and liquid blushes integrate particularly well with bare skin, blending into the skin's texture rather than sitting on top of a powder layer. Powder blush on bare skin can look more vivid than expected, so start with a very lightly loaded brush.
What is the difference between blush and bronzer placement?
Bronzer goes where the sun hits the face first — temples, top of cheekbones, nose bridge, and along the jawline — and its purpose is to add overall warmth. Blush goes specifically on the cheek area to add a flush of color that simulates blood flow and vitality. In practice, bronzer covers a wider, more diffused area; blush is a more targeted, concentrated pop of color on the cheekbones. The two products are used together in most full face routines, with bronzer applied first.
Sources
- 01How to Apply Blush to Complement Your Face Shape — Makeup.com by L'Oréal. Blush placement varies by face shape: round faces benefit from higher placement toward temples for lift; heart faces need color lower on the cheek; oval faces are versatile; square faces benefit from circular application on the apple.
- 02How To Apply Blush and Flatter Your Face Shape — NYX Professional Makeup. Specific blush placement guidance by face shape: round — cheekbones swept back toward hairline; heart — beneath the apple blending toward temples; square and rectangular — apples of cheeks with outward sweep.
- 03How to Apply Blush According to Your Face Shape — e.l.f. Cosmetics. Detailed face-shape placement guide for blush including diamond, oval, square, round, and heart shapes with specific directional sweeping instructions.
- 04How To Apply Blush to Suit Your Face Shape — Charlotte Tilbury. Blush placement technique by face shape; the 'three-finger rule' for the exclusion zone near the nose; universal tip to sweep diagonally upward toward temples for a lifting effect.
- 05How To Apply Liquid Blush — NYX Professional Makeup. Technique for liquid blush application: dot directly on cheek in placement zone, blend immediately with fingertips or sponge; liquid blush begins setting on warm skin quickly.